CapRover with internal Domain
Introduction
When developing web applications you need a suitable test environment. I prefer an environment that is relatively close to the later production environment. Therefore, I have always used a cloud PaaS (e.g. Heroku) for previous developments. Due to data protection, flexibility and costs, I have now set up my own PaaS service in my network using CapRover. However, to use this test environment you need a so-called root domain. Since I only want to use the environment for testing purposes in my own network, it does not make sense to use an official domain for this and to open corresponding ports on the firewall. I.e. I use my own local domain, which can only be resolved in the internal network (local or via VPN). This requires some adjustments to CapRover, as well as my DNS server Pi-Hole.
Adjust CapRover Config
In order to use CapRover with an internal domain, we must first disable the domain verification from CapRover. This would check if the A record of the domain points to the external IP of the CapRover server. Since this is not the case for unofficial domains (there are simply no domain zones) we have to disable this check. To do this, we log-in to our CapRover server via SSH. Then we edit the file "config-override.json":
sudo nano /captain/data/config-override.json
Here we add the following and save the file (if the file does not exist yet it will be created):
{
"skipVerifyingDomains":"true"
}
Now we load the new file into CapRover's configuration by updating Docker:
sudo docker service update captain-captain --force
Adjust Pi-Hole Config
In the next step, we need to make a fixed entry in Pi-Hole so that the internal domain is also resolved for all devices. CapRover requires a so-called wildcard domain so that all published apps are available under the wildcard domain. However, this also means that we cannot do the entry via the Pi-Hole Dashboard. We need to enter the internal domain in the "dnsmasq" file.
We log in to our Pi-Hole via SSH and look at which files are already stored in dnsmasq
ls /etc/dnsmasq.d
01-pihole.conf
Normally only the default file should be located here. This is written dynamically by Pi-Hole and should not be edited. With the next update this file would be overwritten. Instead we create our own .conf file to make our entry.
nano /etc/dnsmasq.d/wildcard.conf
Here we enter our internal domain, in my case "app.dom" and assign it to the IP address of our CapRover server (here 10.10.0.210):
address=/app.dom/10.10.0.210
We save the file and restart the Pi-Hole service
service pihole-FTL restart
Finalization
Now all subdomains of "app.dom" in the network will be resolved and we will be redirected to the CapRover server IP. In order for CapRover to be able to work with the domain, we still have to enter it in the dashboard as a new root domain. For this we call the CapRover installation with port 3000:
http://app.dom:3000
We log in with the default password "captain42".
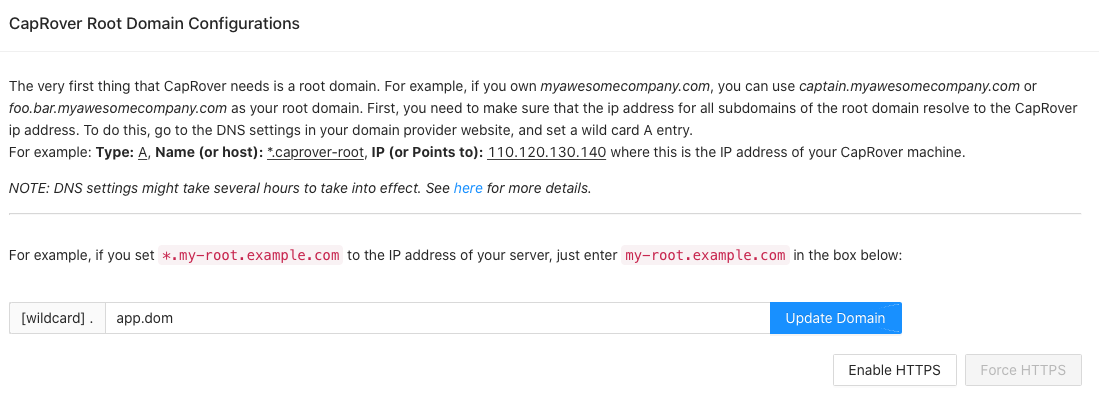
In the dashboard we now enter the root domain and save the entry. ATTENTION: We do not activate HTTPS. Since the installation is only in our internal network, this is not necessary and would also not work (SSL needs resolving domain in public network).
If everything worked out, a confirmation should appear. We can test the functionality by open the domain:
http://captain.app.dom
We should automatically land on the login page to the dashboard. All apps are now published under the domain "app.dom" and are available on the internal network.
Note that it is now no longer possible to resolve a subdomain from app.dom to another server. As long as you can live with it, this approach is perfect.