Use Proxmox ZFS as Time Machine with Openmediavault
If you are running a Proxmox Host in your network you might consider setting up your own backup solution for Mac OS. However, this is normally not as easy as it calls. Apple is kind of restrict in the version of Samba or Linux you have to use and also some manual conf editing might be necessary to make AFP work. But why re-invent the wheel and doing everything from scratch? My own original Apple Time Capsule is already running for around 7 years non-stop and I bought it from eBay for around 100 bucks. But running multiple devices is not only in-efficient but you also face higher energy consumption AND Time Capsule has no raid. So once the HHD will die (and it will of course) I will lose my Time Machine. So I decided to move my TM onto my Proxmox Host using a ZFS storage raid (RaidZ1) and skip a separate device.
Prepare Proxmox
In this tutorial we will not setup a Proxmox Host. I assume that you have a host already running. If not, you could give it a try visiting the original tutorials (https://pve.proxmox.com/wiki/Installation). Also let’s assume you have a ZFS storage available on your Proxmox Host.
First, we create an Openmediavault (OMV) Virtual Machine. You can find the official installation ISO on their website. OMV is one of the largest open source NAS solutions based on Samba. You should go through the complete installation routine and complete the setup until you can access the GUI.
Create ZFS Share
Now we create the ZFS filesystem that we will use for Time Machine backups. Login to your Proxmox Host via SSH and create the new ZFS filesystem with the zfs create command:
zfs create -o mountpoint=/export/timemachine/ -o acltype=posixacl -o xattr=sa -o aclinherit=passthrough tank/timemachine
In the command we specify some options with -o flag:
mountpoint: Where the filesystem will be mounted
acltype: Access Control List, specificly used by OMV
xattr: Extended Attributes for Samba Share
aclinherit: Passthrough of ACL permissions
And we specify the filesystem name in this case tank/timemachine where tank is the name of your ZFS pool. If you don’t know the name of your ZFS pool you find it in the Proxmox GUI under storage or with zpool list
You can now check your filesystems with
zfs list

In this case the new ZFS for Time Machine has also the complete storage capacity as the complete ZFS pool (here 8TB). The issue is that Time Machine has no quota that would stop itself utilizing the hdd until it is full. So with this settings your TM would consume all storage capacity of ZFS.
We can set the storage quota on the filesystem so that we limit TM accordingly with zfs set quota:
zfs set quota=2000G tank/timemachine
In this case we set a maximum storage capacity of 2TB on the tank/timemachine filesystem that we can verify with zfs list:

Mount ZFS on Openmediavault
Now we will mount the newly created ZFS filesystem on our OMV virtual machine. All VM config files are located in the Proxmox Host under /etc/pve/qemu-server/. So we check the config name of our OMV host:
ls /etc/pve/qemu-server/
And open the config with nano
nano /etc/pve/qemu-server/103.conf
We add one line at the bottom making our ZFS filesystem available to the VM:
args: -virtfs local,path=/export/timemachine,mount_tag=timemachine,security_model=passthrough,id=fs0
Where the path is equal the ZFS mountpoint. Save the config file and exit.
Now we start the OMV VM. Once the system has been started we create the mount folder and edit the fstab config to mount our new ZFS filesystem from boot:
mkdir -p /zfs/timemachine
nano /etc/fstab
In the fstab config we add a new line to mount our ZFS with the boot
timemachine /zfs/timemachine 9p trans=virtio,version=9p2000.L,nobootwait,rw,msize=524288,user_xattr,posixacl,_netdev 0 0
Now mount the newly added line without reboot of the VM with:
mount -a
We could check if the mount has been successful:
findmnt -lo source,target,fstype,label,options,used -t 9p

Create Time Machine Share
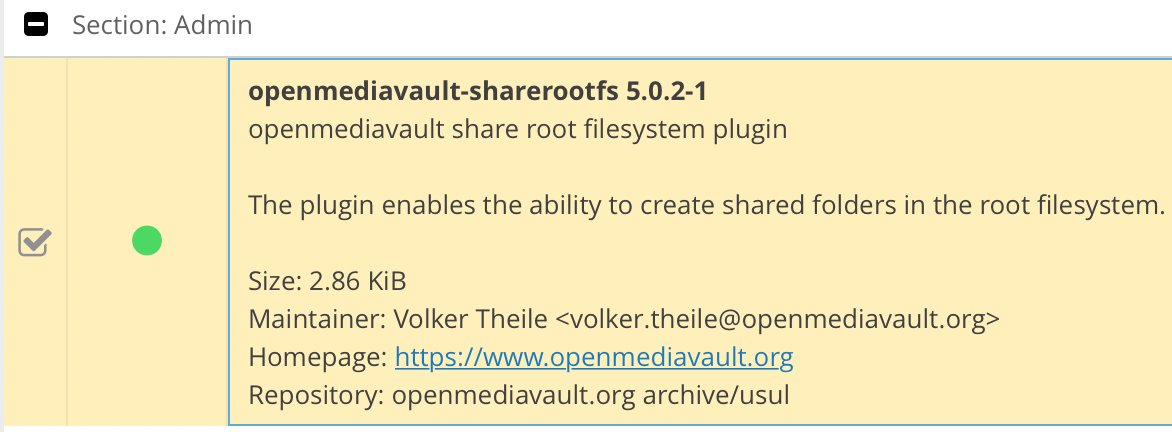
Head back to the OMV GUI on your web browser. First you should check if the plugin openmediavault-sharerootfs has been enabled. This is necessary to access the root folders of the VM and our mounted ZFS folder.

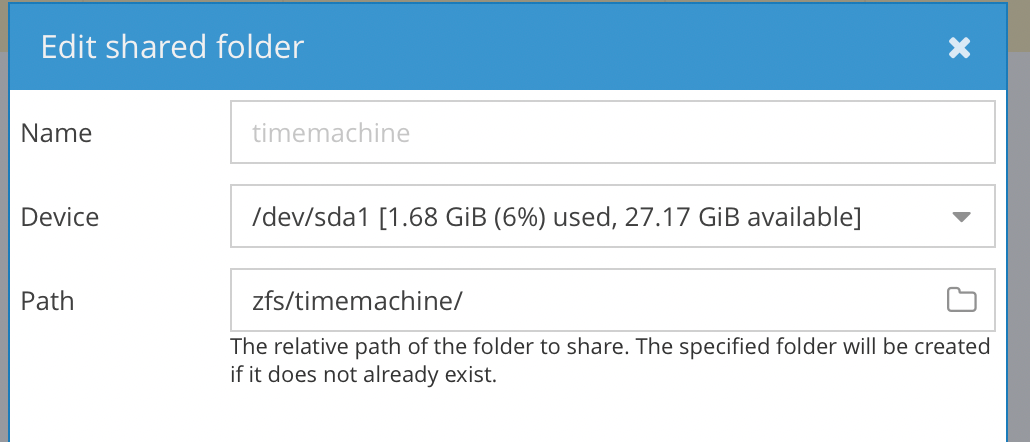
Now move to the Access Rights Management/Shared Folders section. Add a new shared folder and point the path to the ZFS folder on your root files:

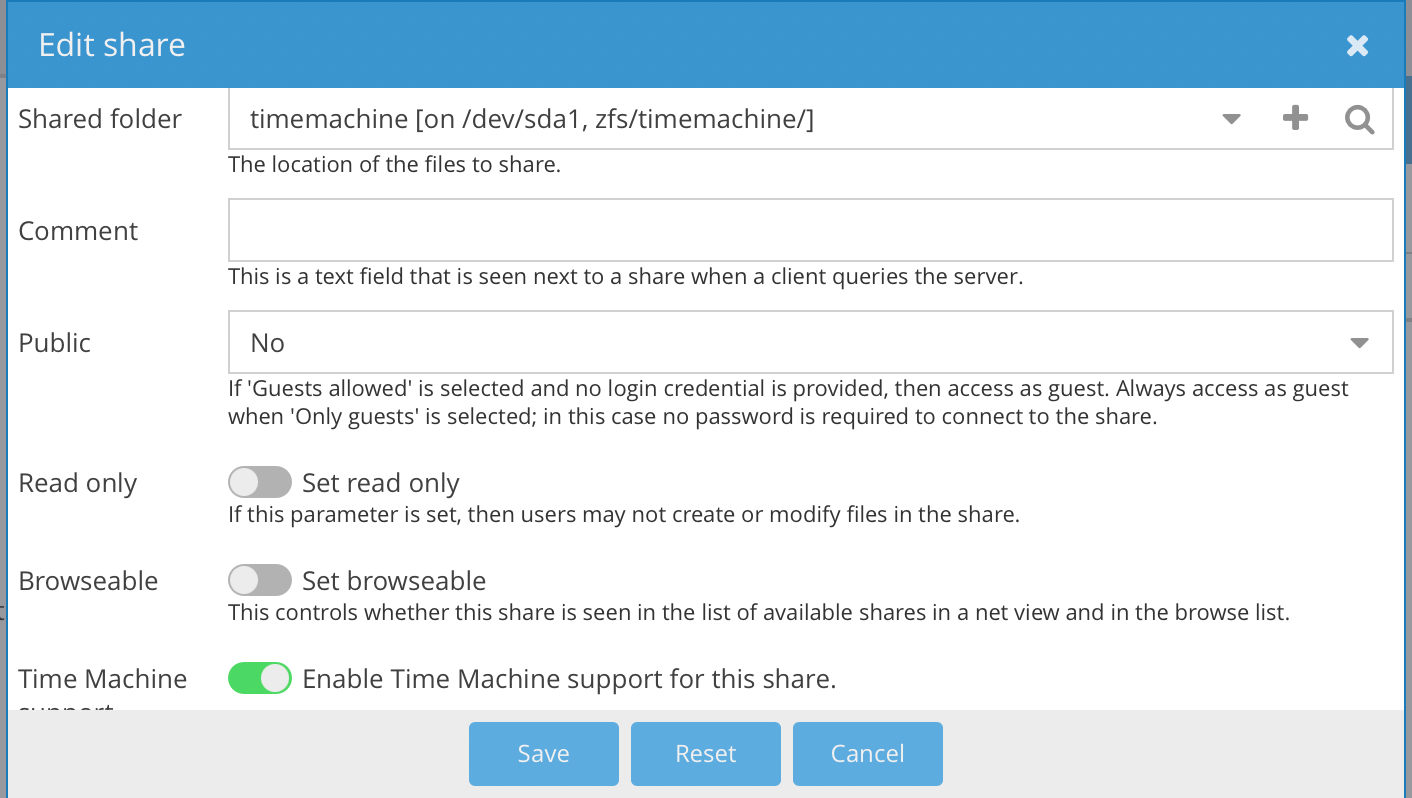
Now we create the Time Machine share in the SMB/CIFS section. We select the just created shared folder and also (important) enable Time Machine Support.

After enabling the new share we can select the volume from the Time Machine settings menu on your Apple device and start the first backup. The menu also shows the maximum storage capacity that we originally set on ZFS.

Like this post?
Hit the subscribe button below and join this blog for free. I will inform you about new issues.
